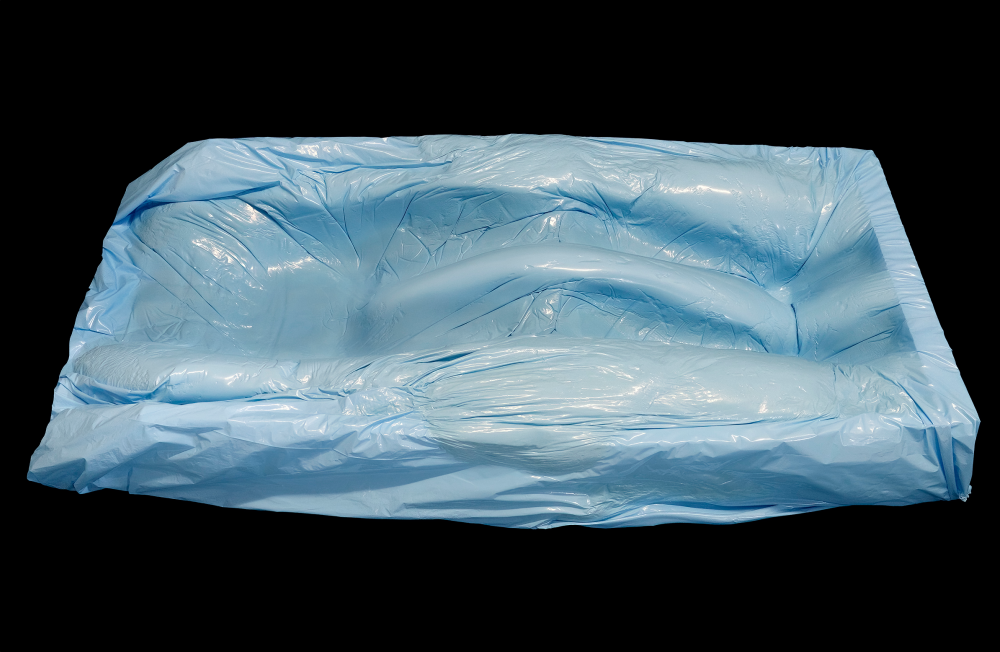
Safety First!
Always practice safety for your patients and staff. Wear protective gloves, smock and eye protection. Have patient remove jewelry before making forms. Always follow directions!
Comfort Your Patient!
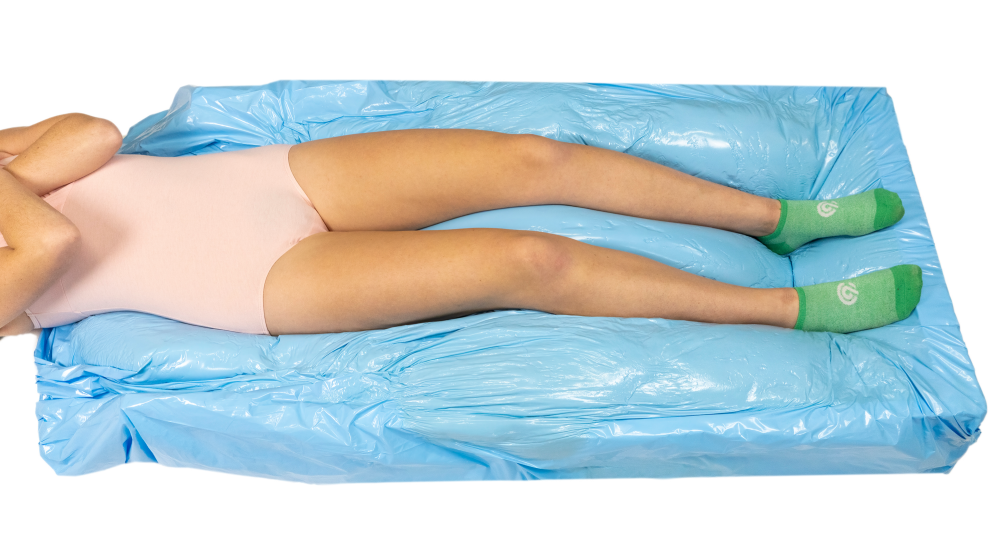
Tell your patient they must lay still for 15 minutes while the foam rises around them. It will feel comfortably warm as it rises and hardens in the position they will need to hold for treatment.
It’s easy to make a Pelvic Form for your patient!
Each kit includes a set of AC660 foaming agents, base board, foot rest, side pieces, knee supports, and a special blue polyform bag.
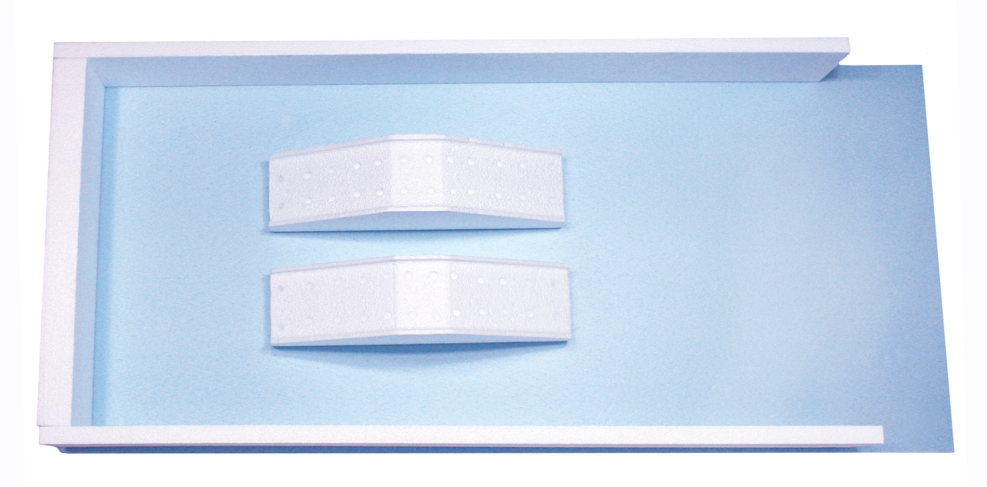
Attach the white end piece, the footrail, onto the blue backboard. Next, attach the side pieces to the desired width. Finally, attach the knee rests to support the patient’s knees. Open the 7 ft. bag and roll back the opening. Place form in bag.
The AC500 and AC660 sets look the same. You MUST READ the labels carefully. Use the AC500 bottle #1 ONLY with the AC500 bottle #2. Likewise, use the AC660 bottle #1 with ONLY the AC660 bottle #2. Do not combine AC500 with AC660, or you may severely burn your patient.
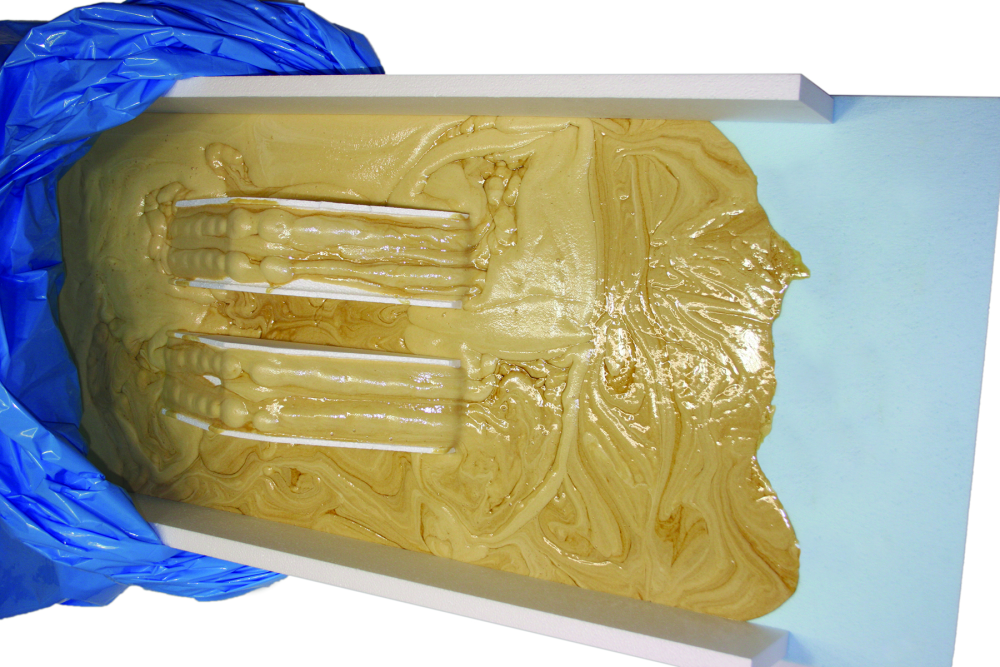
Remove the caps and pour ALL of bottle #1 into bottle #2. Replace the cap on bottle #2 and shake with the cap pointing down, over the form, for ONLY TEN TIMED SECONDS. Immediately remove the cap and pour the entire mixture into the form as shown. Make sure there is plenty of foam on the knee supports. Dispose of the bottles in a leakproof container. DO NOT RECAP.
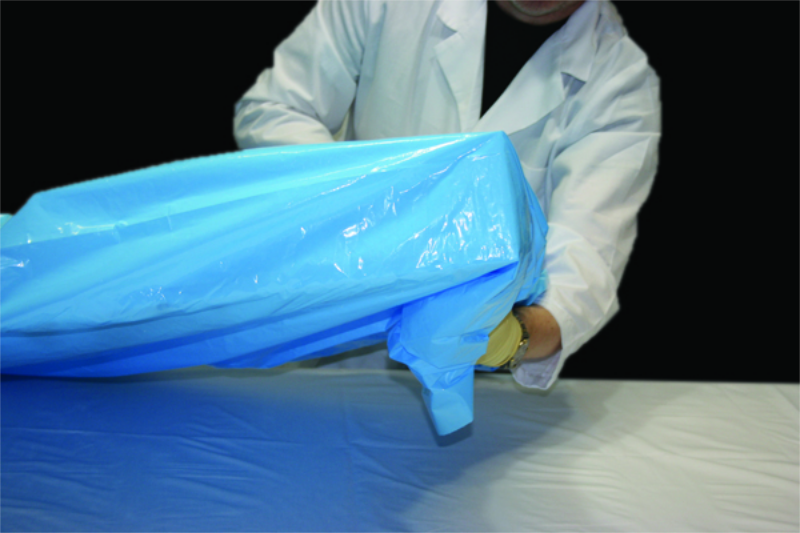
Lift the end of the form and tuck the bag underneath. This will contain the foam and prevent any foam from leaking out of the bag.
After removing patient from form, let form remain on the treatment table for 10 minutes. You now have a truly customized form to immobilize and reposition your patient.
ALPHA CRADLE® BRAND PELVIC FORM MODIFIED HELPFUL HINTS
CREATING TIGHT, SECURE FORMS: When making the customized mold, you must make deep impressions and keep them tight against the patient during the foaming process. This is the only way to effectively create a worthwhile anatomical mold. As the foam rises above the mold, press down hard and hold the foam down tightly against the patient. This will create a highly effective mold.
CURING EACH MOLD: While the form hardens, you can feel it cool back to room temperature within 15 minutes from the starting point (depending upon temperature and atmospheric conditions in the room). Do not allow the patient to get up until the cradle is cool (room temperature) to the touch. If the area underneath the patient is still warm, allow it to cool and harden properly before use. This will result in a secure, comfortable tool to quickly reposition your patient each time they come in for treatment.
SPILLS: Prevent spills by following directions! If foam spills onto a hardened surface, immediately wipe off. Residues of the hardened foam can be cleaned with an acetone-based finger nail polish remover. If foam spills onto any type of carpet or fabric, DO NOT TOUCH UNTIL IT HAS COMPLETELY HARDENED; doing so will only push the foam into the fabric. After it has cured, try to peel off the foam. Hair must be pulled out of the hardened foam or cut out. Use shower caps on patients!
