The Alpha Cradle® Patient Repositioning System

An Assortment of Forms Developed for Cancer Treatment
What started as two forms to target thorax and head & shoulder treatments has grown into more than 40 different assorted anatomical molds. Molds have been specifically developed for use with the following anatomical sites: breast, prostate, pelvic, head & shoulder, thorax, central nervous system (CNS), head, head & neck, and extremities. Different wedges have also been developed that can be incorporated for use with our forms, while several forms have incorporated 15 degree wedges with their inserts. This way you can leave a part of the insert in place to achieve the wedge effect, or completely remove the insert to treat the patient lying flat. Smithers Medical Products, Inc. has also designed dozens of specialty forms for several different medical centers around the world. Some of these incorporate changes cut into our already fabricated forms; others use more or less foam with the forms for a particular use, while still others are especially designed for a specific need for a particular patient set-up. Polystyrene supported foam chairs have been built for use with cyclotrons, while other foams have been created for body pods used with cyclotron use. We work quickly and confidentially with medical centers to create whatever meets the specific needs of each department and method of treatment.
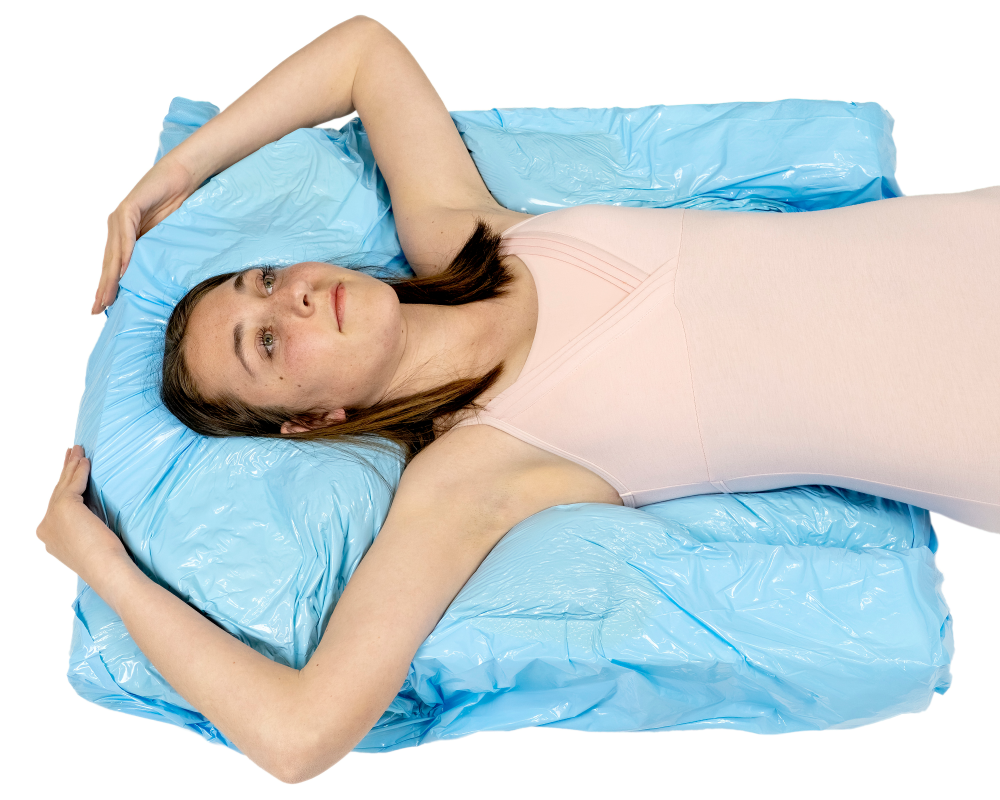
Our latest series of forms are our extended forms. Ever have a 300+ pound patient try to get out of a vacuum bag without ruining its shape? Try our extended forms. They can be made so durable that you can walk on them without changing or damaging the form. Nothing on the market keeps your patient’s body in constant alignment better than these patented, proven devices. Most breast patients have had surgery by the time they are ready for radiation treatment. Many simply cannot hold an arm up as needed for an entire treatment period. Alpha Cradle brand forms will hold your patient in place, so you don’t have to. After they adjust their torso into place, simply place their arm into the mold, pressing their forearm deep into the foam. Now the mold will do all the work, immobilizing your patient, while they lie in their custom-fitted mold very comfortably.
Each kit includes an anatomical shell, a special set of foam specifically designed for the form being used, as well as a special-sized blue polyform bag for optimum use. Custom, hand-made gray bags are also available for more precise accuracy in exact anatomical immobilization and duplication.
SAFETY FIRST: Wear protective gloves, smock and eye protection. Have patient remove jewelry before making forms. Always follow directions!
Tell your patient what to expect.
They must lay still for 15 minutes while their personal customized form rises around them. It will feel comfortably warm as the foam rises and hardens in the position they will need to hold while being treated. IF THE FOAM IS TOO HOT, the bottle was not shaken for the appropriate time. Be sure to shake HARD for 10 timed seconds. The mixture color should be solid. If it is a marbled color, you did NOT shake the bottle hard enough.
If you shake the foam too long, the top three ribs will begin to expand and foam may shoot out. If you notice the top ribs expanding, immediately place the bottle, with cap on, in the provided bag. Wrap it in the bag and place in a lined trash receptacle. The foam will harmlessly spread inside the bag.
If this happens, call our office and we will replace the set of foam free of charge. Safety with each bottle is just one more feature that sets us apart from other device manufacturers.
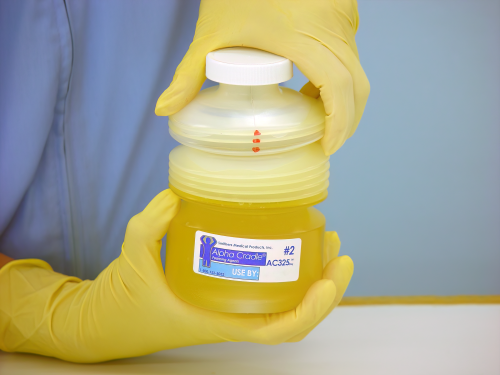 1. Make sure the top 3 red-marked ribs remain collapsed as you remove the cap, then expand the center portion of the bottle.
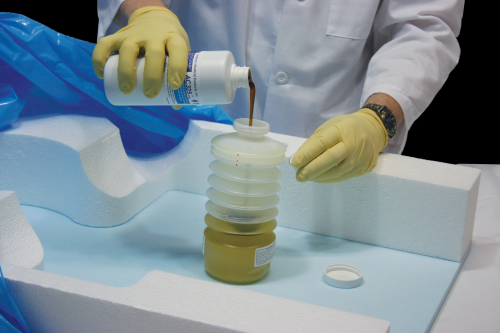 2. Carefully pour the entire contents of bottle #1 into bottle #2, discarding bottle #1 into a leakproof container.
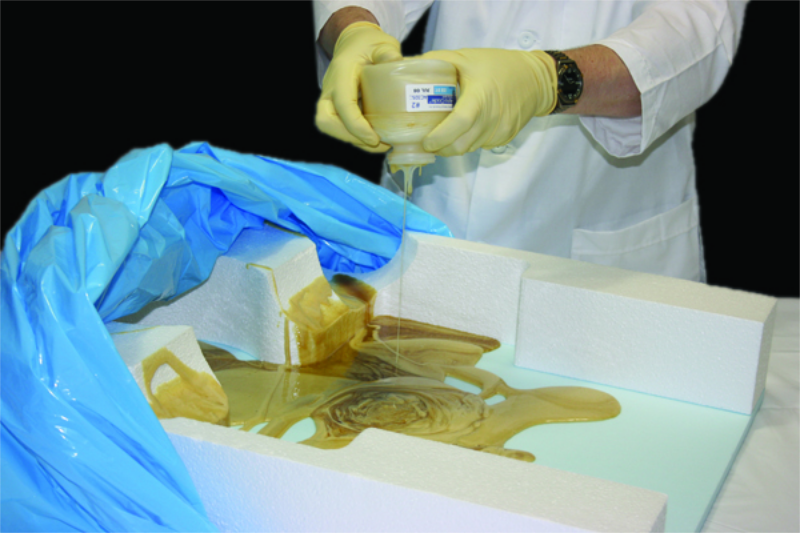 3. Recap the bottle and point it down inside the bag toward the base, away from everyone. The bottle must be shaken vigorously. Shake the bottle for only ten timed seconds and remove the cap immediately.
Pour the entire mixture along the edges inside the form. Make sure you also pour foam along the cutout areas for arms and forearms as needed. Collapse the bottle and squeeze all of the foam out of the bottle. Dispose of the bottle in a leak-proof container.
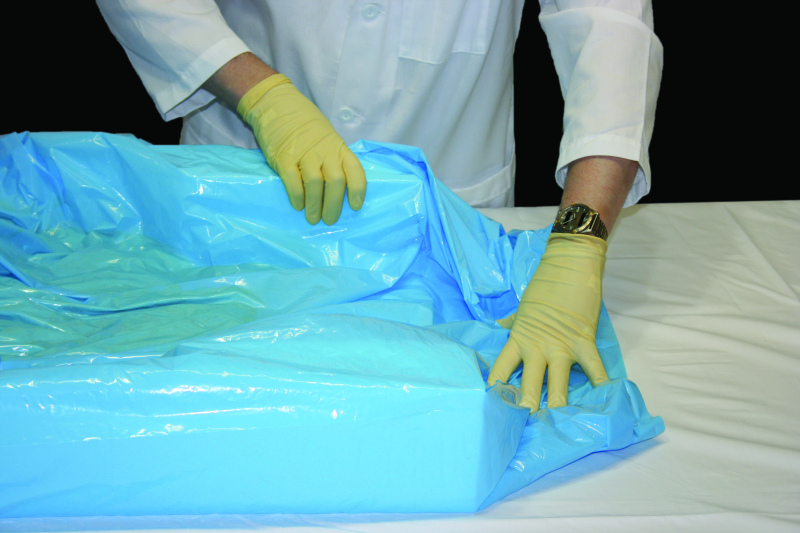 4. Press the bag against the areas of foam, especially around arm guides, edges, and open ends. Fold the corners of the open end of the bag inward, removing as much air as possible without pushing the foam out. This will keep foam from running off of those areas.
5. Carefully lift the end of the form and tuck the folded bag underneath to keep the foam from leaking out of the end of the bag.
Spread the rising foam evenly around the form.
6. Place patient in the desired set-up position. Press the bag down, against the areas of rising foam. Have them hold absolutely still for 15 minutes, until the foam has risen and cooled back to room temperature. Carefully assist your patient out of their form. Let mold cool for another 5 minutes until inside of form has cooled completely.
The completed form is now ready for use.
HELPFUL HINTS
STRENGTHENING FORMS: After pouring the foam around the edges of the form and placing the form deep into the bag, remove as much air as you can before folding the excess bag underneath the form. Allow the foam to start to rise above the form, then push down, keeping the foam level with the form, forcing it tightly against the patient.
CREATING TIGHT, SECURE FORMS: As the foam begins to rise, inform the patient that the foam can actually lift heads and extremities out of the form. Instruct them to remain motionless as you press them deeply into the foam in the desired treatment set-up position. Keep constant pressure on the patient’s anatomy that rises out of the foam, applying gentle yet firm pressure. You must make a deep impression. This may mean putting pressure on top of the patient’s shoulders, allowing the foam to rise to the top of the form.
Foam that rises above the white form is useless. It can be diverted to another area where more foam may be needed, or it may be used to make a tight-fitting mold by pressing it down and holding it down for several minutes, until the foam begins to cool.
CURING EACH MOLD: It is critical that the patient does not move for a full 15 minutes to allow the form to harden properly. As the form hardens, you can feel it cool to room temperature within 15 minutes from the starting point (depending upon temperature and atmospheric conditions in the room). Do not allow the patient to get up until their new cradle is cool (room temperature) to the touch. If the area underneath the patient is still warm, allow it to cool and harden properly before use. This results in a secure, comfortable tool to quickly reposition them each time they come in for treatment.
Spills: Prevent spills by following directions! If foam spills onto a hardened surface, immediately wipe off. Residue of the hardened foam can be cleaned with KY Jelly. This tip came from Brent Woodall (RT)(T). If foam spills onto any type of carpet or fabric, DO NOT TOUCH UNTIL IT HAS COMPLETELY HARDENED; doing so will only push the foam into the fabric. After it has cured, try to peel it off. KY Jelly may also help remove from hair.